
Creating Payment Pages
Building a Payment Page on SMEPay takes just a few minutes.
### Navigate to Payment Pages
From your main Dashboard sidebar, click on **Payment Pages** and select **+ Create Payment Page**.
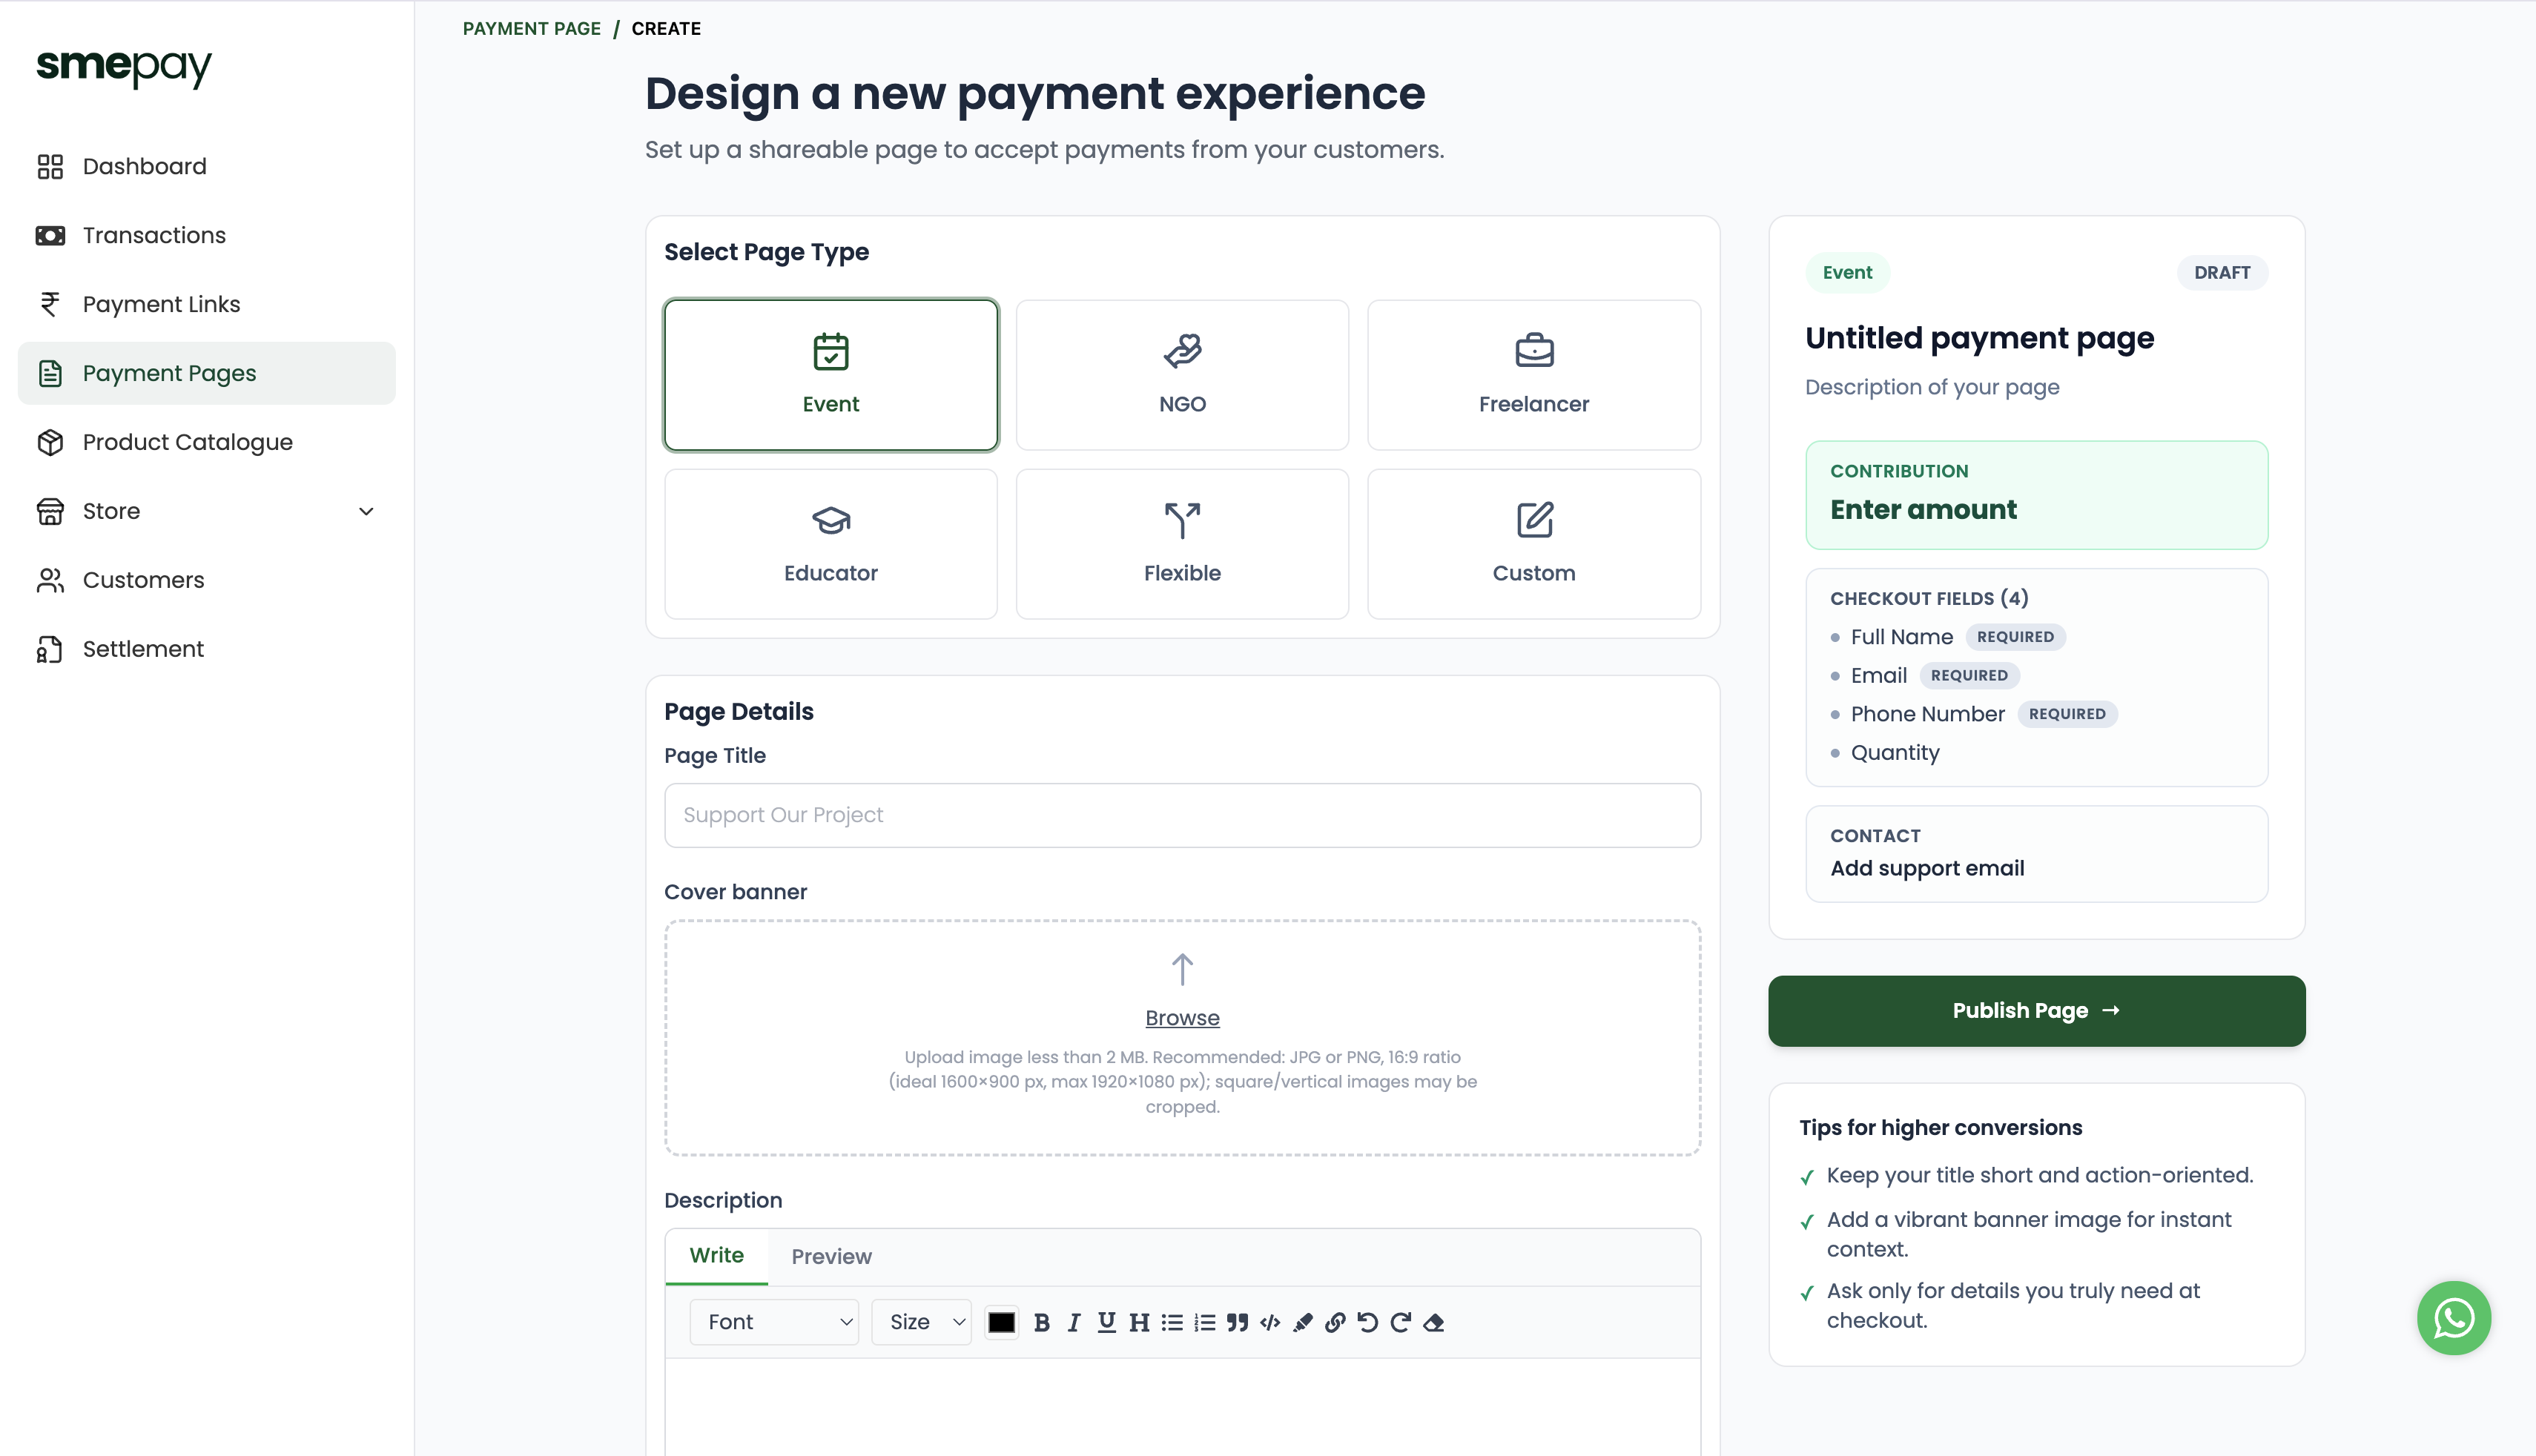
Choose a Page Type
You can start from scratch or select a template based on your use case:
- Event
- NGO
- Freelancer
- Educator
- Flexible
- Custom
ℹ️
**Tip:** Different page types preconfigure common fields and layouts, but you can further customize them later.
Configure Page Details
Set up the payment terms and branding:
- Page Title: Make it short and action-oriented (e.g., "Support Our Project").
- Cover Banner: Upload an image less than 2 MB. Recommended: JPG or PNG, 16:9 ratio (ideal 1600x900 px).
- Description: Use the rich text editor to add detailed descriptions. You can change fonts, sizes, add bold/italic/underline formatting, embed links, insert images, and even write code blocks!
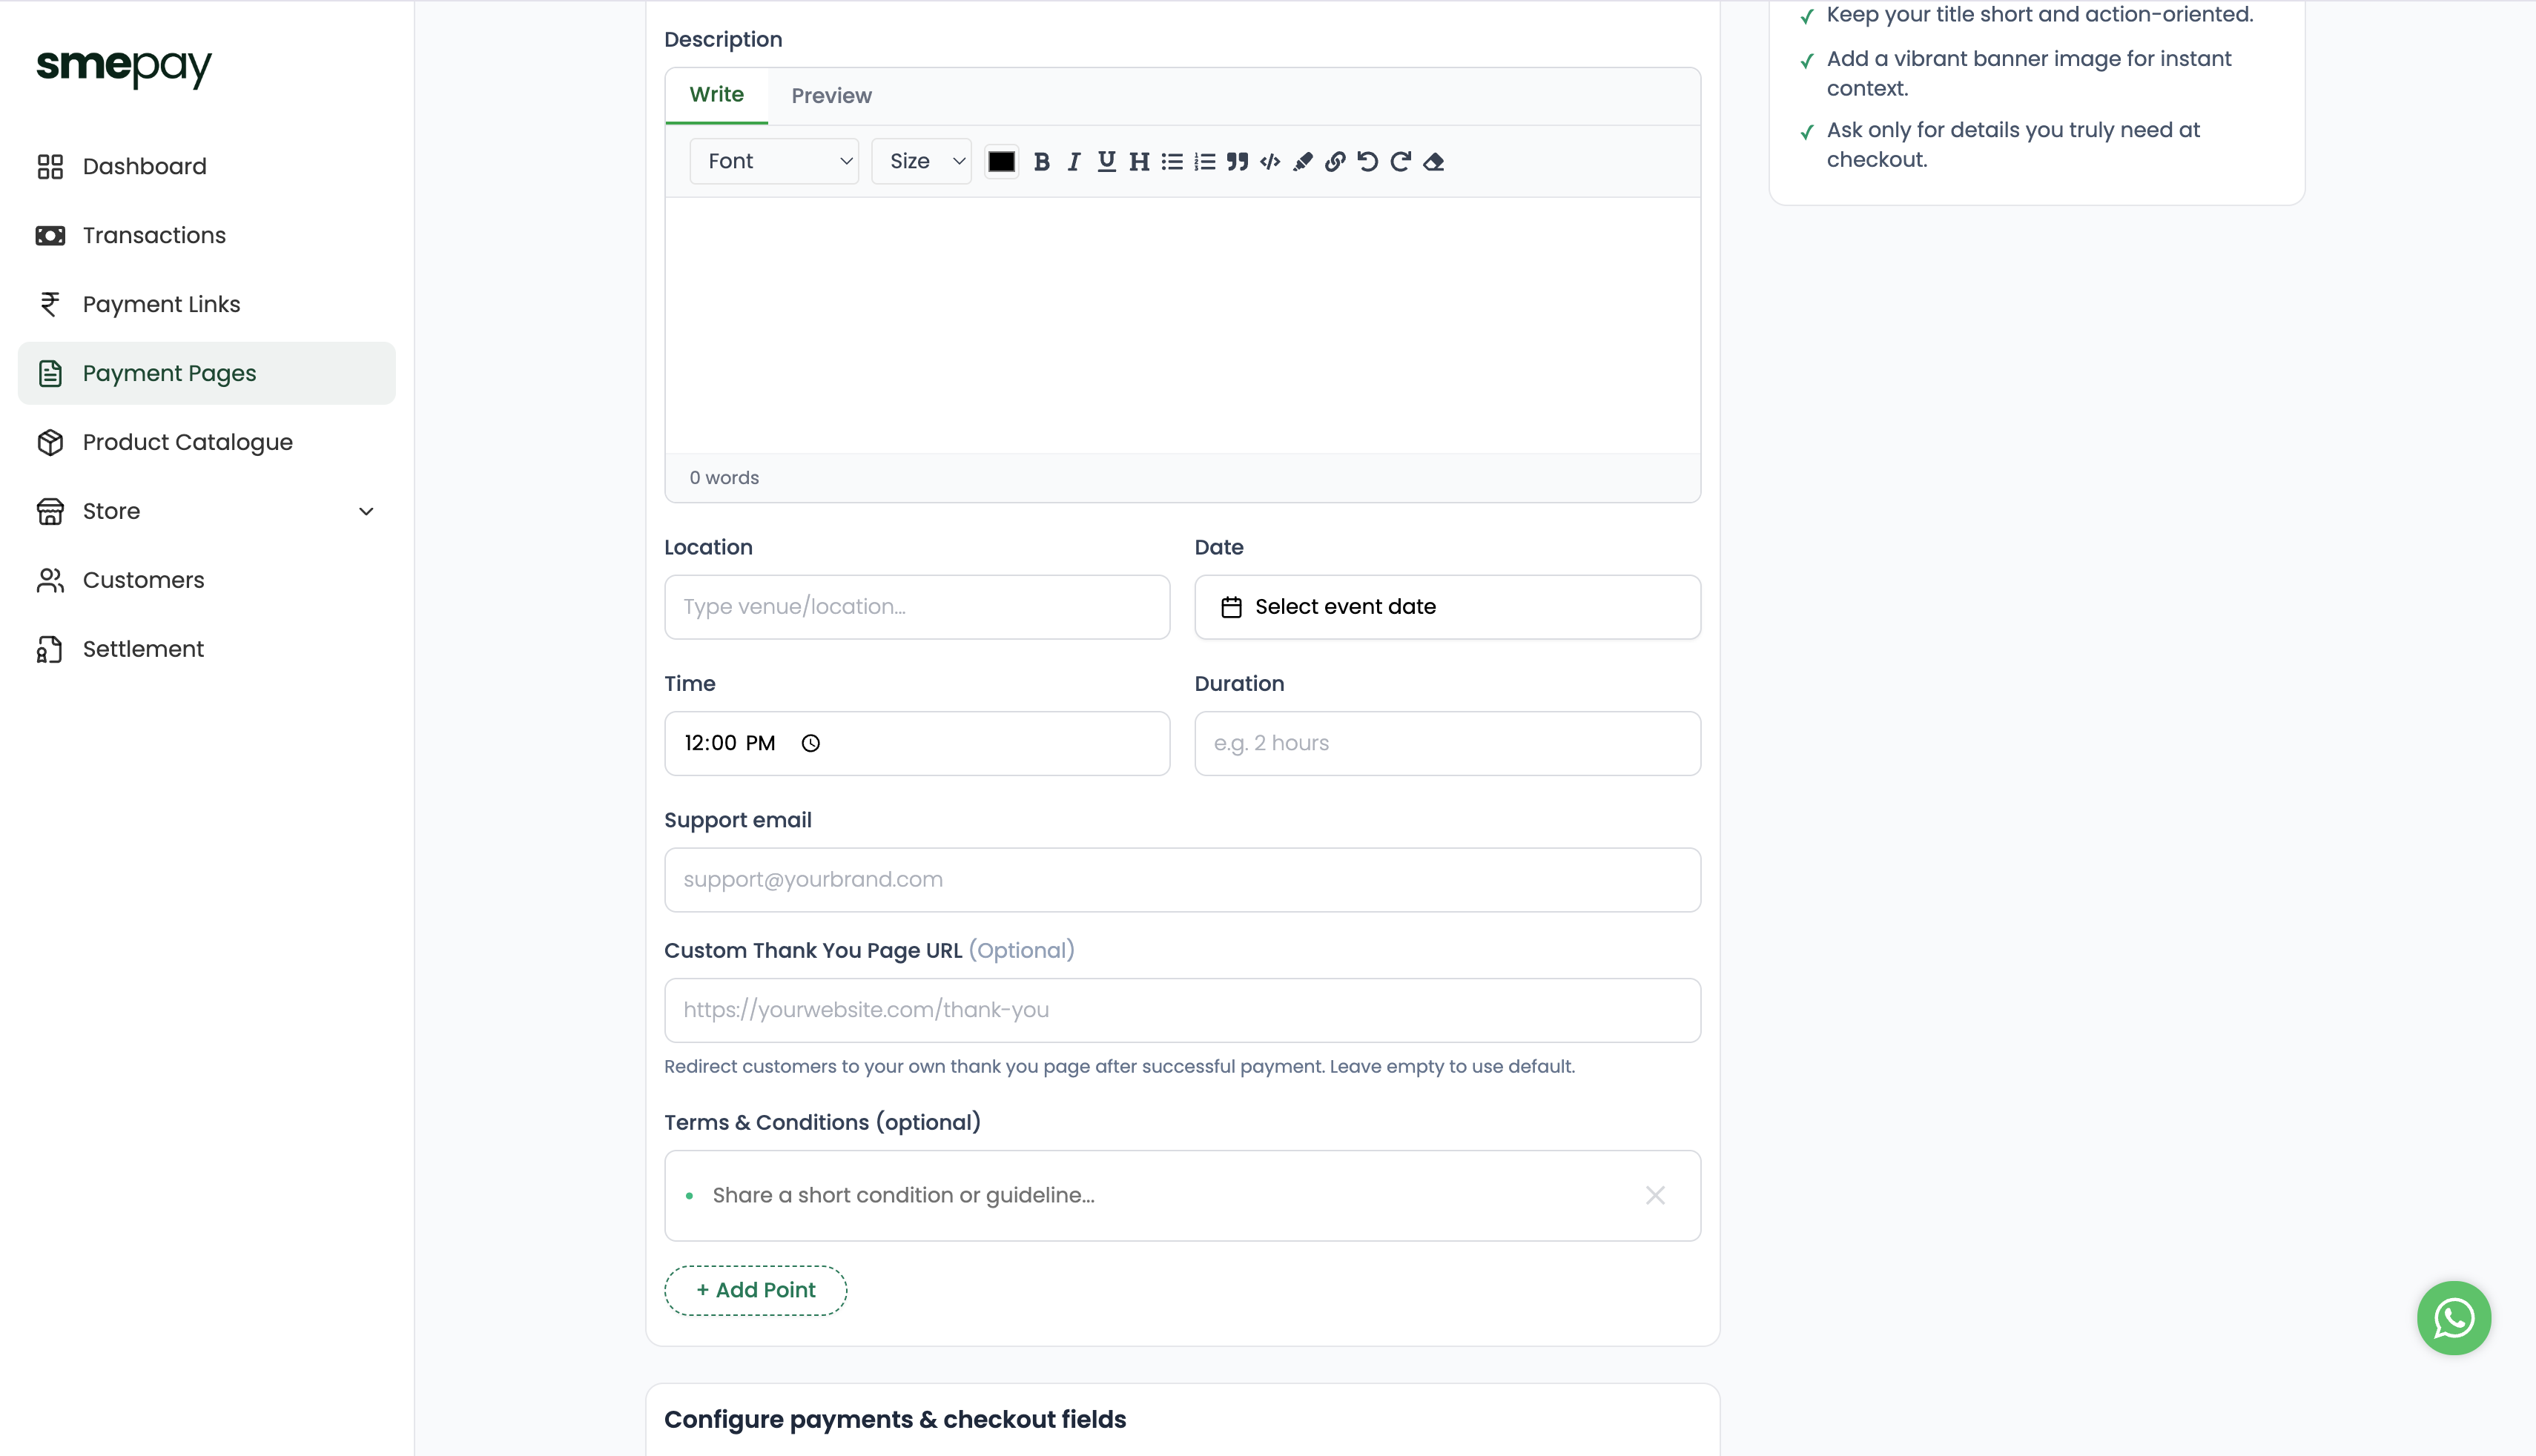
- Event Logistics: If you're hosting an event, you can specify the Location (venue), Date, Time, and Duration.
- Support Email: Provide an email address so customers can contact you if they have issues with their payment.
Add Checkout Fields
You can add fields to collect information before the customer pays:
- Full Name (Required by default)
- Email (Optional)
- Phone Number (Required by default)
- Quantity (Optional)
These fields are collected before payment and will appear in your transaction history for future reference.
Publish
Click Publish Page. You will instantly get a unique, hosted URL that you can share on WhatsApp, Instagram, or link directly from your website.
✅
Your Payment Page is live immediately. Anyone with the link can visit the page and pay via UPI instantly.